Securing Heavy Dragon Stone Arches Without Superglue: Full Guide
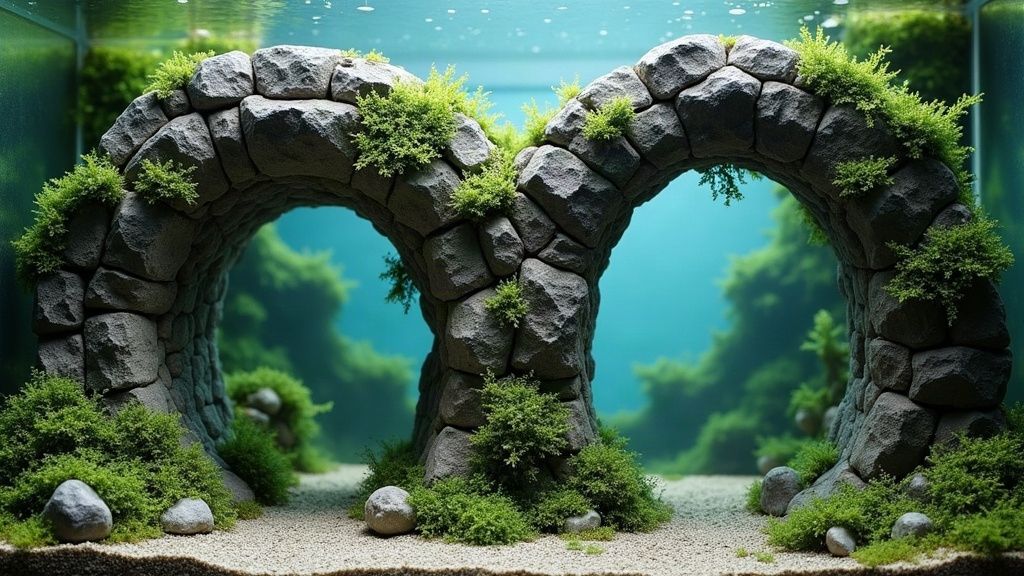
Why Avoid Superglue for Heavy Arches?
Superglue has its place. It’s great for small rock clusters or tacking down a scrap of moss. But ask it to hold a Dragon Stone arch together and you’re pushing it past what it was ever designed to do.
- Weight limits: Dragon Stone is porous and full of irregular pockets, so glue never bonds evenly across the surface. Stack a piece over 5 kg on top of that and you’re basically gambling that the joint won’t shear apart months later.
- Water exposure: In high-flow setups or tanks with harder water, cyanoacrylate tends to whiten and break down faster than people expect.
- No flexibility: Once it cures, that’s it. No wiggle room. If your arch shifts even slightly during a substrate change, the bond just cracks.
- Aesthetic residue: On pale Dragon Stone, glue lines show. There’s no hiding them once the tank’s filled and lit.
For anything structural, physical locking and mechanical support will always beat adhesive. Let the stones do the work.
Beginner Techniques
1. Gravity Locking (Interlocking Notches)
This is the safest place to start, and honestly, it’s often all you need. Pick stones with natural notches, ridges, or flat faces that fit together like puzzle pieces, and stack them so the weight travels straight down through solid contact points, not through one glued seam.
- Dry-fit the whole arch outside the tank first. Don’t skip this.
- Rotate each piece slowly until you feel that “click” where it just sits, no wobble.
- Push from a few different angles to test it before you commit.
2. Substrate Anchoring
Sink the base stones 20-30% into your sand or gravel before you build the upper arch sections on top. This drops the center of gravity and keeps the whole thing from tipping forward.
- Mix in some larger pebbles under the base along with the substrate for extra grip.
- Never rest stone directly on glass. Put down a foam mat or eggcrate layer first, every time.
3. Support Stones (Hidden Buttresses)
Tuck smaller “helper” stones behind or beside the main legs of the arch, out of view from the front. Think of them as kickstands. They soak up the sideways pressure so the main legs aren’t carrying the whole load by themselves.
Advanced Techniques
1. Rebar or Stainless Rod Pinning
For big arches, anything spanning 10+ kg, drill small holes at the contact points with a masonry bit and slide in stainless steel or plastic-coated rebar pins. Essentially you’re building a skeleton inside the rock.
- Drill the holes a touch undersized so the rod friction-fits snugly.
- Stick to non-toxic, non-corrosive rods only: 316 stainless or PVC-coated rod, nothing else.
- Done right, this lets the arch carry actual structural weight instead of just looking heavy.
2. Epoxy Putty (Not Superglue)
Two-part aquarium-safe epoxy putty, the same stuff used for coral mounting, cures rock hard and handles the bumpy, uneven surfaces of Dragon Stone far better than superglue ever will. It fills gaps instead of demanding perfectly flush contact.
- Knead a bit, press it into the joint, hold for 60-90 seconds until it firms.
- Give it 4-6 hours to fully cure. After that it’s completely safe for fish and shrimp.
3. Cable Ties or Mesh Reinforcement (Temporary Scaffolding)
Some experienced scapers use plastic mesh or zip ties as a temporary brace while they place the arch, especially over loose soil that hasn’t settled yet. Once the substrate compacts, usually within 1-2 weeks, they cut the ties away and let the interlocking weight take over completely.
4. Layered Base Platforms
Rather than one flat slab as a base, stack 2-3 flat Dragon Stone pieces of decreasing size like steps. This spreads the weight across a much wider footprint and makes tipping far less likely. It’s basically the same logic dry-stone wall builders have used for centuries.
Testing Your Arch Before Filling the Tank
Before a single drop of water goes in:
- Gently rock the stand or tank to simulate vibration.
- Push each leg of the arch from three different directions.
- Leave it dry-fitted for a full 24 hours, then go back and check for any shift.
If nothing’s moved, you’re good to go. Add substrate, then water, slowly, pouring from a corner so you’re not blasting the arch with direct pressure.
Conclusion
You don’t need superglue to build a heavy Dragon Stone arch that lasts, and in most cases, skipping it actually gets you a sturdier result. Beginners can lean on gravity locking, substrate anchoring, and hidden support stones. Anyone tackling a bigger build can add rod pinning, epoxy putty, and layered platforms into the mix. Either way, the principle doesn’t change: let physics and structure carry the weight, not glue.