Constant Drip Wall for Creeping Figs in a Paludarium
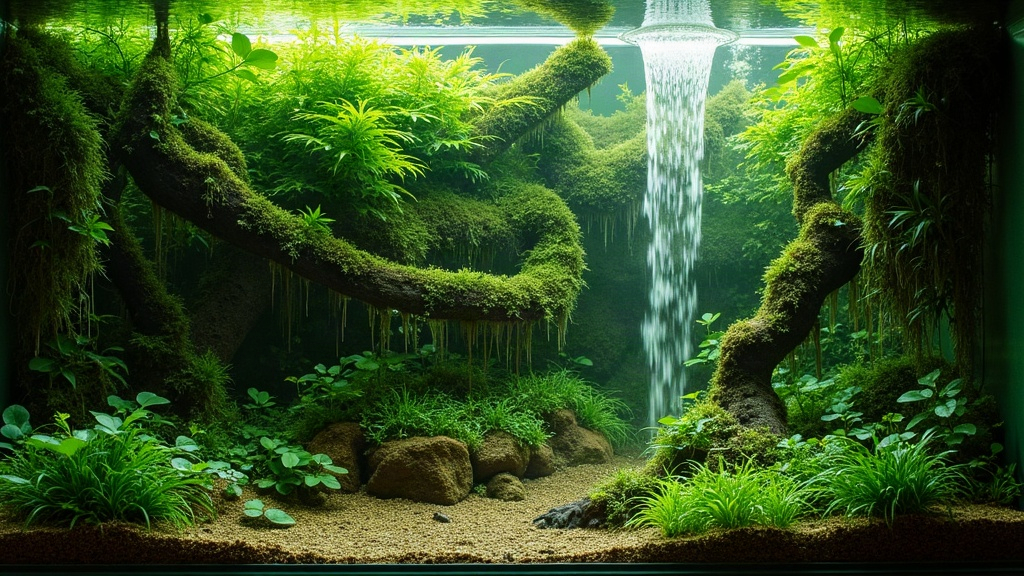
Building a Constant Drip Wall for Creeping Figs
If you’ve ever watched creeping fig (Ficus pumila) struggle in a paludarium that’s only misted a few times a day, you know the problem: it looks fine for an hour after the mist cycle, then the leaves start curling and the vine reverts to that scraggly juvenile growth nobody wants. A constant drip wall fixes this by mimicking what these vines actually experience on rainforest cliffs: a thin film of water running down the rock face, hour after hour, day after day. Instead of chasing humidity spikes, you’re feeding the root mat directly and keeping ambient moisture above 80%, which is roughly where creeping fig switches into its tight, shingled “mature” leaf form.
Why Misting Alone Falls Short
Creeping figs root straight into damp substrate and climb by pressing tiny aerial rootlets into anything porous. In the wild they colonize wet stone and bark near streams, places where moisture barely lets up. Translate that into a glass box and a few things become obvious:
- Misting dries out between cycles. The fig responds by staying in its leggy, climbing phase, with visible gaps between leaves instead of the dense carpet look.
- A drip wall keeps the rooting surface wet around the clock, which pushes the plant toward that tighter mature growth most keepers are actually after.
- The constant trickle doesn’t just help the fig either. It carries nutrients off the background and into the pond or stream section below, so nothing’s wasted.
What You Actually Need
1. Pump and Reservoir
A small submersible pump, somewhere in the 80-150 GPH range depending on how tall and wide your wall is, sitting in the paludarium’s water section. Don’t oversize this. A pump that’s too strong turns your gentle trickle into a sheet of water, and that sheet will erode substrate and knock foliage loose over time. Think “slow seep,” not “waterfall.”
2. Drip Line and Distribution
Airline tubing or micro-drip irrigation line runs from the pump up to the top of the background. A few design choices matter here:
- A spray bar or drilled PVC manifold across the top edge, holes spaced about 1-2 inches apart.
- A flow valve on the main line, so you can dial things back to a slow seep instead of letting it run wide open.
- Multiple drip points instead of one single outlet. One point means dry patches elsewhere, and figs simply won’t root where it’s dry.
3. Backing Material
The roots need something textured to grip and drink from:
- Expanding foam, carved into shape and coated with a silicone-and-peat or silicone-and-coco-fiber mix.
- Cork bark panels work well too, since they wick water naturally and give aerial roots an easy surface to latch onto.
- During the early establishment phase, a thin layer of sphagnum moss pinned over the foam helps a lot. Pull it off once the roots have taken hold.
4. Drainage Channel
All that water has to go somewhere, and it shouldn’t pool against the glass or rot your substrate. Build a false bottom, or a sloped gutter at the base of the wall, hidden behind rocks or driftwood, that feeds straight into the water section.
Building It Step by Step
- Shape the background with expanding foam. Carve in ledges and crevices for planting pockets as you go, don’t leave it flat.
- Seal and texture using GE Silicone I (100% silicone, no mold inhibitors), pressing coco fiber or peat into it while it’s still tacky for grip.
- Let it cure fully. Give it 48 to 72 hours minimum before adding water or plants. Rushing this step is the most common mistake people make.
- Install the plumbing before final assembly. Route the tubing up the back of the foam so it stays hidden, with the manifold sitting just below the top rim.
- Dry-run the pump for a few hours and adjust the valve until water seeps evenly across the wall rather than puddling in one corner.
- Plant the figs by tucking small cuttings or rooted plugs into damp pockets in the upper third of the wall. Gravity does the rest, carrying moisture down to whatever you’ve planted lower.
- Watch it closely for the first two weeks. New plantings need visibly damp surfaces at all times. If one section dries out between cycles, bump up the drip rate there.
Keeping It Running Without Problems
- Pair the wall with a snug glass or acrylic lid to hold humidity in. If condensation builds up too much, crack the lid slightly for ventilation.
- Check the tubing and manifold holes once a month for mineral buildup. Tap water with high calcium content will clog these fast, so use RO or rainwater instead.
- Trim the fig regularly. In constant moisture it grows quickly and can literally smother your drip points if you let it go unchecked for a few weeks.
- Watch for standing water at the base. Stagnant pooling invites mold, and the drainage channel should keep that area damp, never flooded.
The Payoff
Get the balance right (gentle pump, textured silicone surface, proper drainage loop) and you end up with something close to self-sustaining: high humidity, low maintenance, and a dense wall of mature-leaved creeping fig doing exactly what it would on a wet cliff face in the wild. The whole system, once dialed in, mostly just runs itself.